‘PC won’t turn On’ is one of the most common problems faced by many PC users worldwide. It results in a great deal of annoyance because the last time when you checked your PC, it was working fine without any problems and you have shut it down properly. Most of the time, this problem happens randomly giving you an unpleasant surprise. In some cases, the problem is not very serious and goes away with minor troubleshooting but in some cases, it becomes very painful to detect the exact root of the cause, and sometimes you may have to replace some major components because they have become faulty. So, there are many factors involved (mostly hardware) that can cause the failure of your PC to turn On. So, to help you troubleshoot this problem, here I am going to explain the major causes of the ‘PC won’t turn on’ problem along with their solutions.
‘PC Won’t Turn ON’ Major Causes & Solutions
Below are the various causes of the ‘PC won’t turn on’ problem along with their solutions. There are generally two cases associated with the problem, wherein the first case, there is no power going to your components while in other, the power is getting to the components but there is no display.
Case 1: No Display + Fans don’t Spin
In this case, there is no display on the monitor and the PC case fans and CPU fan don’t spin. It means there is no power going to the system or the power supply unit (PSU) of the PC.
Check AC Power Socket and Switch
The first thing to do when your PC won’t turn on is to check the AC wall power outlet and switch. Make sure that the AC wall socket and switch are working or not. If they are at fault then switch to another AC wall socket and try turning ON your PC. If the PC starts and is working as expected then you have solved the issue. On the other hand, if the wall power socket is working fine then you need to investigate for other causes that are being mentioned below.

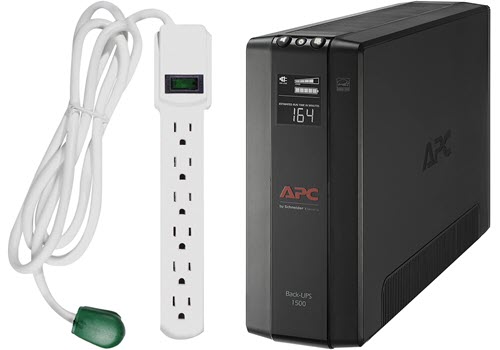
Check Surge Protector / Power Strip or UPS
If the AC power socket and switch are working fine the next thing to check is the surge protector or UPS if you use them. The main thing to check in the surge protector and UPS is the fuse. If the fuse is blown then you have to change it and also look for the cause of it. A faulty electrical component or shorting of any kind can result in a blown fuse and you should repair or replace the faulty component immediately otherwise the fuse will blow out next time too. If the UPS or Surge protector are fine and do not have any faults then you have to inspect other causes of the problem that are being mentioned below.
Check PC Power Cable / Cord
Next is to check the power cord or cable that goes into your power supply and AC power socket. First, make sure that the power cord is fitted properly and does not have any loose-fitting or connector. After that, check the power cord for continuity and whether it has breakage or burnt wires inside. You can check the power cord using a multimeter by using its continuity function. If you don’t have a multimeter then you have to cross-check it using another power cord. If the power cord is alright then you can move to the next step of inspection or troubleshooting.
Must Read: Must have Tools for PC Cleaning, Repair & Maintenance
Check Power Supply Unit (PSU)
If you have done everything above and still not finding the fault then you have to check your PSU. A faulty could be the cause of the problem where your PC is not turning ON. You can go through the below-mentioned article that explains in detail on how you can check your power supply using various methods and techniques.
If the power supply is not working or is at fault then you have to replace it. On the other hand, if it is working fine then you have to look for other causes.
Faulty Motherboard
If your power supply is working fine then a faulty motherboard can be a cause of the problem. It is relatively rare but can happen sometimes. If the motherboard is at fault then you can either get it repaired or replace it with a new one. If the motherboard is under warranty then you can RMA it to get a replacement.
Must Read: How to Find out your Motherboard Details?
Case 2: PSU Working + Motherboard LED ON + Fans don’t Spin + No Display
In this case, the power supply is working fine, fans don’t spin, the motherboard LED is lit on (if the motherboard has it) but there is no POST screen and display on the monitor.
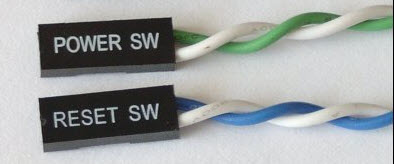
Check PC Power Button & Jumper Cable
Check the PC power button and its jumper connection to the motherboard. The power button can be at fault or the power button cable jumper connection might have come loose. Also, In a newly built or assembled PC, a user can misconfigure the Power and Reset button cable jumper connections which will prevent the PC from turning ON.
Check out: Fix PC Power Button Not Working [Causes and Solutions]
Motherboard Issue
A faulty motherboard can also be a culprit even if you are still having the motherboard LED ON. So, if every other component and setting is alright then you have to inspect the motherboard. If the motherboard is faulty then get it replaced or repaired.
Case 3: Fans Spin + No Display
In the last case, whenever you press the PC power button, CPU and PC Case fans will spin but there is no display or POST screen. In this case, there is a high probability that there is no problem with the power supply and motherboard but an issue with other components.
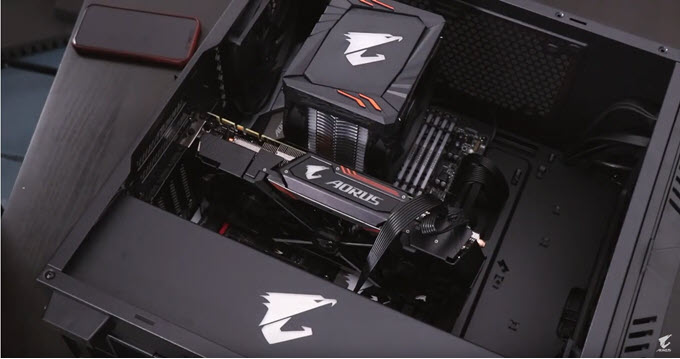
Check Video Card & its Cable
The first thing to check is the graphics card or video adapter cable. Make sure the display cable is not loose and is working fine. If you have a discrete graphics card installed then reseat it by removing it and inserting it again carefully. If you have a long or big graphics card installed that sags a lot and is not having proper contact with the PCIe x16 slot then you can use a GPU support brace or bracket to support the graphics card and align it properly with the PCIe x16 slot. If the video adapter/card and its cable is working properly then move to the next step of the troubleshooting process.
Check out: Display Converter Cables & Adapters for Video Cards
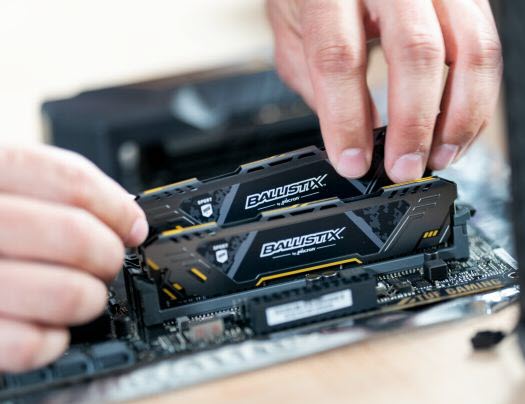
Check RAM
The second thing to check in this case is the RAM or system memory. Remove the RAM from the DIMM/RAM slots and reseat it again by inserting it into the RAM slots carefully. In some cases, you may also want to clean the RAM slots using compressed air or air blower, and you can use isopropyl alcohol to clean the RAM contacts. If you have more than one RAM stick installed then try booting the PC using a single RAM stick one by one. If you can boot the PC using any one of the RAM sticks but could not do so with others then most probably that RAM stick is faulty. You can also cross-check the RAM in your friend’s or other PC to make sure that the RAM is alright or it is the culprit. If the RAM stick has gone bad then you have to replace it with a new one.
Check out: Best Budget DDR4 RAM for Intel and AMD PCs
Debug Motherboard Beep Codes
If your motherboard has a speaker and throws out beep codes then you can troubleshoot the problem quickly by investigating the error beep codes using your motherboard manual. For example, a single beep code may indicate DRAM refresh failure and five short beep codes indicate processor failure for a given motherboard. It should be noted that beep codes do vary for different motherboard BIOS or manufacturers, so it is better to consult your motherboard manual for decoding beep codes for the exact error or problem.
See also:
- Fix PC Freezes while Gaming
- Fix ‘PC Stuck on Motherboard Screen’ Issue
- Fix PC or Laptop won’t Shut down in Windows
- How to Fix PC Crashing Problem [Top Causes & Solutions]
- How to Lower RAM Usage [Fix High RAM Usage]
- Fix PC Restarting Randomly while Gaming
Queries?
If you have checked and done everything mentioned in this post and your PC is still not turning On then you can ask me your query in the comment section below by clearly stating your complete PC hardware specifications and problem in detail.
(*This post may contain affiliate links, which means I may receive a small commission if you choose to purchase through the links I provide (at no extra cost to you). Thank you for supporting the work I put into this site!)
![How to Increase Graphics Card Performance [Top Tips & Tricks]](https://graphicscardhub.com/wp-content/uploads/2016/11/increase-graphics-card-performance-211x150.jpg "How to Increase Graphics Card Performance [Top Tips & Tricks]")
![Fix Hard Drive Overheating for PC & Laptop [Lower HDD Temperature]](https://graphicscardhub.com/wp-content/uploads/2019/10/fix-hdd-overheating-211x150.jpg "Fix Hard Drive Overheating for PC & Laptop [Lower HDD Temperature]")
![Graphics Card Stopped Working Suddenly [Top Causes and Solutions]](https://graphicscardhub.com/wp-content/uploads/2023/05/graphics-card-stopped-working-suddenly-211x150.jpg "Graphics Card Stopped Working Suddenly [Top Causes and Solutions]")